

The tutorial is designed to provide the knowledge to merge the RFID HAT with the Raspberry Pi board. It also contains the process of integrating the actuator, in this particular case LED, with the Raspberry Pi to make it responsive to the correct reading from the RFID HAT.
Required components
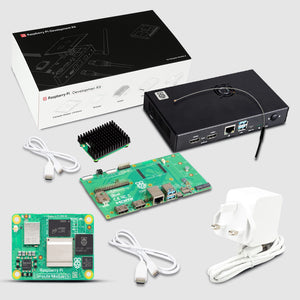
- Raspberry Pi Board
- RFID Module
- HDMI Cable
- Mouse + Keyboard
- Monitor/TV
- Micro USB Cable
- Breadboard
- Jumper Wires
Course of Action
1. Circuit Design
LED will work as an actuator which turns on after the correcting reading is generated by the RFID module. The RFID HAT uses SPI (Serial Peripheral Interface Bus) to communicate with Raspberry Pi. A user can wire all the pins with the raspberry pi as per the below table to run the assembly. One can use a solenoid lock, a speaker, etc as an actuator that logs the data.
|
RFID Pin |
Raspberry Pi Pin |
|
3.3V |
Pin 1 |
|
RST |
Pin 22 |
|
GND |
Pin 6 |
|
MISO |
Pin 21 |
|
MOSI |
Pin 19 |
|
SCK |
Pin 23 |
|
SDA |
Pin 24 |
One needs to connect the actuator ( LED) to pin 18 on the Raspberry Pi device.
2. Code Writing
- First, open a command-line window and enter sudo raspi-config to start the process of enabling the SPI. In the configuration menu, select interfacing options and then select P4 SPI. Now the window will ask about enabling the option of SPI then select “yes” and the “The SPI interface is enabled”. Open the command line terminal and then enter the command sudo reboot to reboot the Raspberry Pi system that would finish enabling SPI.
- We are using the example of Python 2 for the programming which one should take care of while developing the connection between their hardware and software. Firstly, one needs to install python 2.7 by entering sudo apt-get install python2.7-dev. Clone the library from the github to install the packages. enter the SPI-Py directory by typing cd SPI-Py and then install the library, sudo python setup.py install.
- One needs to change to talk to the RFID by using the script Read.py. A user needs to comment “Authenticate” which comes at the end of the script. One should also take care of the import time library at the header of the script. The user has to find the section of the “#Configure LED Output Pin”. One can configure the actuator at this point as per their requirement. Now the user needs to go to the heading “#Check to check that the card UID read matches the subjective card UID.” This If/Else statement checks the UID the reader reads from a card to a UID you have saved in the script. If the UIDs match, the actuator is outputted to a HIGH.
3. Run the code
- Getting the UID
The user needs to get their card’s UID when they run the scripts for the first time. Now change the directory with the directory the user has saved in the system. A user should run the script by typing python Read.py. because the script has selected the card’s UID on it. If one places any other card in front of the reader then it will deny access to that other card. Note the UID which will display on the screen. Now edit that script in the program and change the script’s UID to this shown value and then save it.
- Running the final script
The user should run the script again by typing the python Read.py. When the user takes the card in the range of the reader, the access should be granted and the LED will turn on for 5 seconds. The doggy door will then work like this.
4. Other design tips
There are some other ways also to design the doggy doors which one can use in their life. There are following ways one should do.
1. One should add the second solenoid with the assembly to lock the door from both sides.
2. The user needs to add the magnetic sensor to the assembly with a magnet to the door so that the device(Raspberry Pi) can get the information that the gate has come to the closed position before locking it.
3. If one knows the advanced programming then they can change the firmware on the chipset to meet the applications with high efficiency.
5. Implementations
- Door lock
- Payment service for fare
- Safety lock


1 comment
Imanol
Hello,
I am looking for RFID HAT for Raspberry PI and I found one in your web. I want to know if a specific version of Raspberry PI is required or not. Minimum RAM required for using it?
Thank you